Amazon Web Services (AWS) offers a powerful suite of tools for managing cloud resources, and AWS Identity and Access Management (IAM) is at the heart of securing these resources. IAM Identity Center, the successor to AWS Single Sign-On, is a central hub for managing access and security for your workforce identities across multiple AWS accounts and applications. In this guide, we’ll walk you through the process of configuring the AWS CLI to connect to your AWS account using IAM Identity Center and demonstrate how to access an S3 bucket. Let’s get started!

Prerequisites
Before diving into the configuration, ensure you have the following prerequisites in place:
- AWS Account: You need an AWS account created with an email address that you can access.
Configuration Steps
1. Enable the Identity Center Directory
IAM Identity Center enables you to efficiently manage workforce user access to multiple AWS accounts and applications. To enable it:
- Log in to your AWS account.
- Navigate to IAM Identity Center and Enable
- Optionally, modify the domain name for the AWS access portal URL.


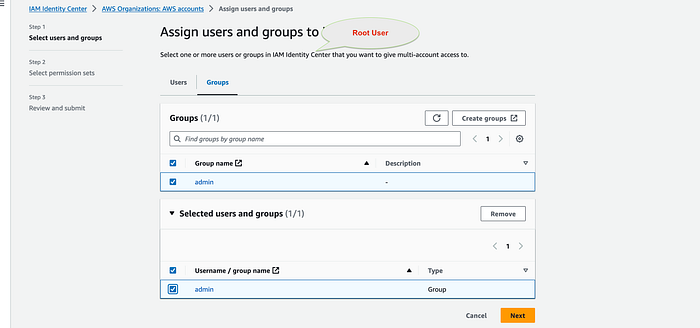
2. Create Users and Groups
To manage access effectively, you should create users and group them accordingly. Here’s how:
- Inside IAM Identity Center, Create a group group (e.g., “admin”) and create a user (e.g., “mahen”) and add them to the group (e.g., “admin”). If the group does not exist, create it.


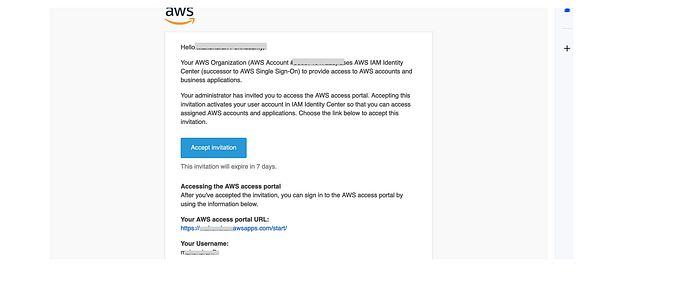
3. Accept the Invitation
After adding users, you will receive an email with the subject “Invitation to join AWS Single Sign-On.” Open the email and choose “Accept invitation” to complete the user setup process.
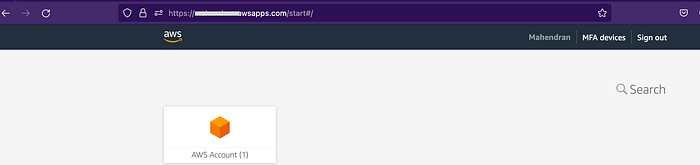
Reset the Password and log back in.
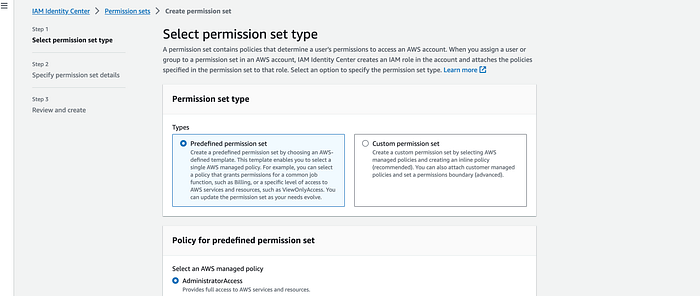
4. Add Permission Sets
Permission sets define what actions users can perform within your AWS environment. To create an administrative permission set:
- Within IAM Identity Center, choose “Create administrative permission set.”
- Select “AdministratorAccess” and choose “Next.”
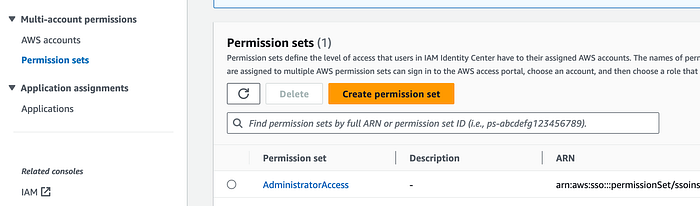
This process activates IAM Identity Center, creates an administrative user, and assigns them an appropriate least-privilege permission set.
5. Update AWS CLI Configuration
Now that you’ve configured IAM Identity Center, it’s time to update your AWS CLI configuration:
- Configure AWS CLI with SSO:
aws configure sso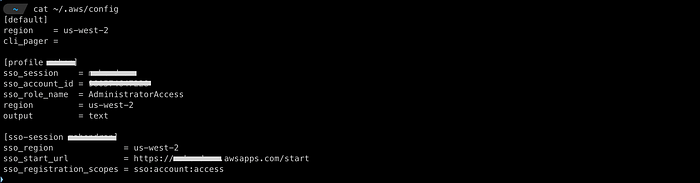
~/.aws/config file- Log in using your SSO profile:
aws sso login --profile <YOUR_PROFILE>
6. Access S3 Bucket
You can now access your S3 bucket using your configured profile:
aws s3 ls --profile <YOUR_PROFILE> s3://
Troubleshooting
If you encounter the “ForbiddenException” error when calling the “GetRoleCredentials” operation with a message like “No access,” follow these steps:

Verify is if the permission set of the SSO user matches with the sso_role_name in your aws profile config.

With these steps, you should now have a properly configured AWS CLI that can connect to your AWS account using IAM Identity Center, allowing you to manage your cloud resources securely and efficiently.
